Quarantine Vegetable Gardens

  • #801
Make sure to make your beds in a spot in your yard that gets 6-8 hours of sun a day, Payrollnerd! nice pile of boxes you gathered, cannot wait to see the put-together beds, I thought the pool noodles was a great idea!
:)
Thanks for the tip! Agreed. That area I took a photo of this evening was right before sunset so it was a bit shadier. I had that big oak tree pruned way back so now the area is very open and sunny. I have another photo of it before the tree was pruned. It was pretty sunny then too. The sun comes up from the front of the house and sets in the back yard. So both my side yards are sunny most of the day.
 

Attachments

  • 05D6ADB5-F90D-4EB0-9F2E-5E2A0474B9E5.jpeg
    05D6ADB5-F90D-4EB0-9F2E-5E2A0474B9E5.jpeg
    157 KB · Views: 24
  • #802
I think I’m done dumpster diving at the moment. Ha! I got 2-3 layers of cardboard down over a 10’ x 24’ or longer area. Tomorrow the plan is to get the wire mesh down. I have a rubber mallet to pound in the metal U shaped things.

I took a few photos from further back to give a better view of the space. Those concrete edging pieces are heavy!
 

Attachments

  • 7B93C202-D299-4137-B183-F9E1D14607B3.jpeg
    7B93C202-D299-4137-B183-F9E1D14607B3.jpeg
    161.7 KB · Views: 36
  • 48EB9678-6F87-4548-AF54-8A9330EB2213.jpeg
    48EB9678-6F87-4548-AF54-8A9330EB2213.jpeg
    192 KB · Views: 40
  • 939AE1B3-785F-4A26-9F9C-51757A0FDA60.jpeg
    939AE1B3-785F-4A26-9F9C-51757A0FDA60.jpeg
    169.3 KB · Views: 35
  • #803
I think I’m done dumpster diving at the moment. Ha! I got 2-3 layers of cardboard down over a 10’ x 24’ or longer area. Tomorrow the plan is to get the wire mesh down. I have a rubber mallet to pound in the metal U shaped things.

I took a few photos from further back to give a better view of the space. Those concrete edging pieces are heavy!
Great job!!! Use the garden hose on the cardboard to wet it some and get it to lay flat when you start working more, the water will hold the cardboard in place for you without needing the edging pieces while you work on the next steps.
 
  • #804
Hi all, pleased to happen across this thread. I’m going to give my raised beds another try this year, didn’t exactly cover myself in glory last year.

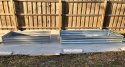
I have four small raised beds, all about 1.5 metre sq and edged with wooden railway sleepers. Two are positioned on soil which was dug over. In one I planted a gooseberry bush (purple fruits apparently which I was interested in) and a redcurrant. Waiting to see if they survived the winter. In the other I relocated another gooseberry which was too crowded where it was. Whether that survives the move we’ll see. Last year I tried planting a plum tree there which died, so I ended up putting camomile seeds in it which took really well and smelled lovely. My attempt at tea was gross though.

In the other two I have bean and pea seeds ready to go in when it gets warmer. I grew early radish last year which was fun because they cropped early. I like the beans because I grow them up obelisks which looks pretty, but they did really well. My tomatoes failed last year, they needed more water and went black - won’t put those in veg beds again. Cucumbers did ok in a grow bag.

We also planted another plum and an apple last year so I’m looking to see how they come on in spring. I also have in the garden borders raspberries, a blueberry bush, a blackcurrant and boysenberry bush (these two were new last year, no fruit yet). Plus slightly overrun by bramble, so plenty of blackberries. Strawberries in pots. The problem is I let the birds take most of the berries because they make me smile, hopping up and down for their booty.

Next step for me is to top up the two empty beds with some compost I have ready. Weather here is v cold still so there’s no rush. When it warms up a bit I’ll take some photos.
 
  • #805
Great job!!! Use the garden hose on the cardboard to wet it some and get it to lay flat when you start working more, the water will hold the cardboard in place for you without needing the edging pieces while you work on the next steps.
It’s going to rain tonight thru the early part of tomorrow. Perfect timing. I finally felt rested enough that I got the mesh down today. I may need a bit more tho.

Tomorrow I will start on the landscape fabric. I have a 4’ x 100’ roll of heavy duty gray type. I have 50 little pins and a mallet. I want to cover the entire 10’ x 30’ area. That should leave me enough to make a deep bag for tomatoes, I think.
 

Attachments

  • D5901FE6-D044-442F-8FBD-8BE1A41390CF.jpeg
    D5901FE6-D044-442F-8FBD-8BE1A41390CF.jpeg
    153.1 KB · Views: 24
  • 907549F5-CAB1-46CF-8F7D-1CF6859DC0FB.jpeg
    907549F5-CAB1-46CF-8F7D-1CF6859DC0FB.jpeg
    134.4 KB · Views: 22
  • #806
I tried pounding in the metal pins with my rubber mallet. It was hard to get them thru the cardboard. Some areas were soaking wet from the rain too. Many up them didn’t stay down or in.

Anyway I sorta got the mesh pinned down where it mattered. Then I laid out the landscape fabric. I overlapped it by about a foot or so. I am not sure if I should bother to put the pins in it.

I came in to rest and may go back out there. Maybe put pins where it overlaps and put the pieces of concrete edging around the entire spot. Thinking. Thinking.
 

Attachments

  • B3EAA28F-1261-4408-8A2B-DD5F1D599777.jpeg
    B3EAA28F-1261-4408-8A2B-DD5F1D599777.jpeg
    128.4 KB · Views: 24
  • F838FD14-6315-49C3-BD65-F8EBED19CB31.jpeg
    F838FD14-6315-49C3-BD65-F8EBED19CB31.jpeg
    153 KB · Views: 24
  • #807
I tried pounding in the metal pins with my rubber mallet. It was hard to get them thru the cardboard. Some areas were soaking wet from the rain too. Many up them didn’t stay down or in.

Anyway I sorta got the mesh pinned down where it mattered. Then I laid out the landscape fabric. I overlapped it by about a foot or so. I am not sure if I should bother to put the pins in it.

I came in to rest and may go back out there. Maybe put pins where it overlaps and put the pieces of concrete edging around the entire spot. Thinking. Thinking.
Looking Good @PayrollNerd !! Thanks for sharing your progress. It is very come here in Michigan so it’s nice to see some spring!
 
  • #808
@PayrollNerd Great work, using the concrete at the edges! Here's hoping the soil i imagine you will put on top of the landscaping fabric will hold everything down from here on out! You have my respect and admiration, having built raised beds I know from experience the hard work it is , kudos to you!! Super job, and thanks for adding another grower to the earth.. you! :D:)
 
  • #809
My husband is looking forward to starting seeds next month...we have a giant monster (cat) in our house that decimated my starts last year. He has a "plan".
 
  • #810
After a week of entirely too much wasting time….. LOL! Some days I need a swift kick in the butt so I accomplish more.

Anyway, I assembled the 3’ x 6’ x 12” garden bed today. They aren’t particularly difficult to assemble. However the instructions could be more informative, as some pieces almost but not quite line up. But you don’t realize it until you have 3 of the 4 bolts in. That’s your hint you did it wrong. I am sure the other 2 will not take as long to assemble.

My neighbor told me to give him a heads up when the dirt is delivered. He offered to load the bags up and wheel them out back. He’s such a nice guy. Maybe I can convince a few others to come by and help too. I’m not holding my breath tho.
 

Attachments

  • ADFABDE4-0776-40CA-AAD8-9D2D0C33589A.jpeg
    ADFABDE4-0776-40CA-AAD8-9D2D0C33589A.jpeg
    112.8 KB · Views: 36
  • 8A9090E8-DC8C-45E1-8E00-C07C25FB8A3D.jpeg
    8A9090E8-DC8C-45E1-8E00-C07C25FB8A3D.jpeg
    123.8 KB · Views: 34
  • #811
some pieces almost but not quite line up. But you don’t realize it until you have 3 of the 4 bolts in. That’s your hint you did it wrong. I am sure the other 2 will not take as long to assemble.

Don't tighten any bolts all the way until you have them all in just enough to hold the corner together. Then tighten one corner a little more, then the opposite corner, and keep doing that all the way around until all are tight. That way you don't find yourself fighting with one corner that doesn't line up.

Everything is coming together and looking great!
 
  • #812
@PayrollNerd looks great. That is what we have, raised beds with grow bags in them. We do one tomato plant in each grow bag. And I put garlic, marigolds around the plant in the grow bags to keep bugs away. Last summer, we had tomatoes every day from July to October.
 
  • #813
I assembled one of the 4’ x 8’ beds today. They are just shy of that size of course. I got it lined up with the metal mesh under the landscape fabric. I didn’t realize they were different than the smaller one. The corners are not folded metal so they are sharp. The panel edges are folded metal and are not sharp. I may have some packing spongy type foam and I know I have an old pool noodle.

Tomorrow I will assemble the last one. Once I have that in place I can start dropping in things like leftover cardboard, toilet paper rolls, twigs or whatever. That can start to degrade until I can get the soil and compost delivered.

The black ants are everywhere because of the oak trees. Today I noticed the tiny red ants had arrived so time for some ant patrol!!
 

Attachments

  • EBCD1610-507F-45AF-AFCA-3508C07929AF.jpeg
    EBCD1610-507F-45AF-AFCA-3508C07929AF.jpeg
    112.3 KB · Views: 16
  • #814
@PayrollNerd looks great. That is what we have, raised beds with grow bags in them. We do one tomato plant in each grow bag. And I put garlic, marigolds around the plant in the grow bags to keep bugs away. Last summer, we had tomatoes every day from July to October.
How big around are your tomato grow bags? I was thinking a 5 gallon bucket size maybe? I have marigold seeds.

I still can’t find wide mouth canning lids locally. I guess I’ll have to look online.
 
  • #815
  • #816
I assembled one of the 4’ x 8’ beds today.

They are looking great! Good plan on how to fill the bottom of your beds, as well! You are an inspiration, I finally sowed at least my bell pepper seeds I saved from last year and am trying to stay motivated too, reading your progress really helps, thank you, lady!
 
  • #817
Same on wide mouth canning lids, but I am hoping supplies will pick up, we still have till July or so for them to show back up in stores!
 
  • #818
I assembled one of the 4’ x 8’ beds today. They are just shy of that size of course. I got it lined up with the metal mesh under the landscape fabric. I didn’t realize they were different than the smaller one. The corners are not folded metal so they are sharp. The panel edges are folded metal and are not sharp. I may have some packing spongy type foam and I know I have an old pool noodle.

Tomorrow I will assemble the last one. Once I have that in place I can start dropping in things like leftover cardboard, toilet paper rolls, twigs or whatever. That can start to degrade until I can get the soil and compost delivered.

The black ants are everywhere because of the oak trees. Today I noticed the tiny red ants had arrived so time for some ant patrol!!
You are amazing! I have really enjoyed your updates!
 
  • #819
How big around are your tomato grow bags? I was thinking a 5 gallon bucket size maybe? I have marigold seeds.

I still can’t find wide mouth canning lids locally. I guess I’ll have to look online.
I've been able to buy an off brand at my local grocery store, but you are only allowed to buy 2 at a time. I get two packages each time I shop. I'm happy to ship some to anyone who can't find them.
 
  • #820
And, they’re all assembled! There’s about an hour until sunset so I’m going to put some cardboard and twigs in them.

It is beautiful here today. The breeze is slightly cool for it being nearly 80 degrees and low humidity.
 

Attachments

  • E6288E44-5DE6-4E59-B0A0-D2C0602362C2.jpeg
    E6288E44-5DE6-4E59-B0A0-D2C0602362C2.jpeg
    88.2 KB · Views: 28

Members online

Online statistics

Members online
132
Guests online
1,886
Total visitors
2,018

Forum statistics

Threads
632,358
Messages
18,625,256
Members
243,109
Latest member
cdevita26
Back
Top